


Most people only start thinking about wood fence care when the damage is already done. A board splits after a cold winter. The whole fence starts looking washed out and grey. Or you notice soft, spongy spots near the base where moisture has been sitting too long. By that point, you are already playing catch up.
The good news is that protecting your fence does not require professional help or expensive treatments. A reliable wood fence sealer and a little bit of effort goes a long way. This guide covers everything from understanding why wood breaks down to learning the best way to stain a fence so that the results actually hold up over time.
Wood and Weather Are Not Friends
Here is something worth understanding before anything else. Wood is not a static material. Even after it has been cut, shaped, and nailed into place, it is still reacting to its environment every single day.
When it rains, wood absorbs moisture and swells. When the sun comes out and temperatures rise, that moisture evaporates and the wood contracts. This happens over and over again through every season. All that expanding and contracting gradually weakens the wood fibers from the inside out. Small cracks form. Those cracks invite more moisture in. Mold and mildew follow. Eventually the wood becomes brittle, discolored, and structurally compromised.
UV rays add another layer of damage. Prolonged sun exposure breaks down the lignin in wood, which is the natural compound that gives it its color and rigidity. That is why an untreated fence slowly turns that dull, silvery grey even when it has not been touched by rain for weeks.
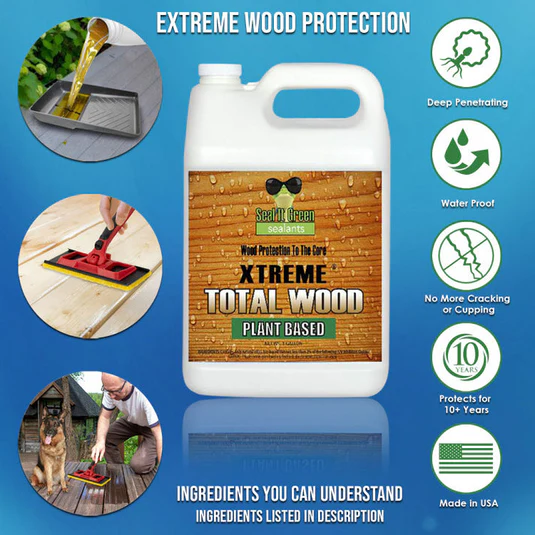
A quality wood fence sealer interrupts this process. It fills the porous surface of the wood, repels moisture, blocks UV penetration, and prevents mold from gaining a foothold. It is one of the simplest forms of preventive maintenance a homeowner can do, and the payoff in fence longevity is genuinely significant.
Getting to Know Your Sealer Options
There is no single sealer that works perfectly for every fence in every climate. The right choice depends on your wood type, your local weather patterns, and the look you are going for.
Penetrating Sealers work by soaking deep into the wood rather than forming a film on top. They protect from within, which makes them extremely effective for weathered or thirsty wood that has been exposed for a while. Because they do not sit on the surface, they also tend to look more natural and are less likely to peel or flake over time.
Film Forming Sealers create a protective coat on top of the wood surface. They offer solid protection and can give the fence a slightly glossy or satin finish depending on the formula. The downside is that surface coatings can eventually crack or peel, especially on wood that expands and contracts significantly through seasonal changes.
Water Based Formulas have improved dramatically over the years. Modern water based sealers offer strong UV and moisture protection while being easier to apply and much more pleasant to work with. They dry faster, produce less fume, and clean up with water. For most residential wood fences, a high quality water based sealer is more than sufficient.
Oil Based Formulas still have their place, particularly for dense or heavily weathered wood. They penetrate deeply and provide excellent long term moisture resistance. They take longer to cure and require mineral spirits or paint thinner for cleanup, but the durability they offer on the right type of wood is hard to match.
Sealers with Built In Tint allow you to protect and color the fence in one step, which brings up one of the most commonly searched topics in fence maintenance.
The Best Way to Stain a Fence and Actually Get It Right
Staining a fence sounds straightforward, but a surprising number of people end up with results that look uneven, fade quickly, or start peeling within a season. Almost every time, the problem is not the stain itself. It comes down to preparation and application technique.
Here is a practical, step by step approach that reflects the best way to stain a fence based on what actually works in the real world.
Pressure Wash or Hand Scrub First
The fence needs to be completely clean before any product goes on. Dirt, pollen, mold spores, and old flaking sealers all create a barrier that prevents new stain from bonding with the wood. A pressure washer is the fastest option, but even a stiff scrub brush with a dedicated wood cleaner does the job well. Work from top to bottom so you are not washing debris onto sections you have already cleaned.
Let the Wood Dry Fully
This step gets rushed more than any other, and it is one of the biggest reasons staining jobs fail early. Wet wood cannot properly absorb stain. It sits on the surface, dries unevenly, and is far more likely to peel. Depending on the weather, give the fence at least 24 hours after washing. In cooler or more humid conditions, 48 hours is a safer bet. Touch the wood with your hand. If it still feels cool or damp, wait longer.
Sand Any Rough Spots
Washing sometimes raises the grain of the wood, leaving the surface slightly fuzzy or rough. A light pass with medium grit sandpaper smooths things out and opens up the wood pores so the stain can absorb more evenly. Pay particular attention to any areas where the old finish was peeling, as those spots often need a bit more attention to level out.
Check the Weather Before You Start
Temperature and humidity matter more than most people realize. Staining in direct afternoon heat causes the product to dry before it has fully soaked in, which leads to surface buildup, lap marks, and poor adhesion. Staining when rain is forecast within 24 hours is just as bad, since moisture interferes with curing. A mild morning with temperatures between 10 and 27 degrees Celsius and low humidity is close to ideal.
Use the Right Tool for Each Section
Wide flat boards go fastest with a roller or a wide brush. Narrow gaps between boards, post tops, and intricate sections need a smaller brush for proper coverage. Some people prefer a sprayer for large fences, which definitely speeds up the process, but you need to be careful about overspray landing on plants, concrete, or nearby structures. Mask off anything you want to protect before you start.
Apply Two Full Coats
A single coat almost never delivers the depth of color or the level of protection that two coats provide. Let the first coat dry according to the product instructions, then come back and apply the second. The result will be richer in color, more consistent in coverage, and significantly more durable.
Seal It Green has long championed the idea that consistent care and proper technique matter far more than simply buying the most expensive product on the market. A mid range sealer applied correctly will always outperform a premium product slapped onto a poorly prepared surface.
Knowing When It Is Time to Reseal
One of the easiest ways to check if your fence still has protection is the water bead test. Pour a small cup of water directly onto the wood. If the droplets bead up and sit on the surface, the sealer is still working as it should. If the water soaks straight into the wood and darkens the surface immediately, the protection has worn off and resealing is overdue.
Most sealers provide reliable coverage for two to four years under normal conditions. Fences in climates with extreme heat, heavy rainfall, or harsh winters may need attention more frequently. A quick visual inspection once a year, checking for graying, cracking, or soft spots, helps you catch issues before they become costly problems.
A Few Things to Keep in Mind When Choosing a Product
Always check that the sealer is appropriate for your specific wood species. Treated lumber, cedar, pine, and hardwoods like ipe all have different porosity levels and chemical compositions that affect how they absorb and hold sealers.
Look for products that list UV blockers, water repellents, and mildewcide as active ingredients. These three features cover the main threats that wood fences face. If the label does not mention at least two of those three, keep looking.
Conclusion
Taking care of a wooden fence does not have to feel like a big project. Once you understand what a proper wood fence sealer actually does and commit to learning the best way to stain a fence before diving in, the whole process becomes manageable and even satisfying. Clean the surface, let it dry, apply your product in good conditions, use two coats, and check back in every year or two. Brands that genuinely care about outdoor wood protection, like Seal It Green, will tell you the same thing. Prevention is always easier than repair, and a little consistent effort now keeps your fence looking great and standing strong for many years ahead.
